Accompanying the exhibition Acquired! Shaping the National Design Collection, Cooper Hewitt’s conservators offer a closer look into the process of preparing collection objects for display and long-term preservation.
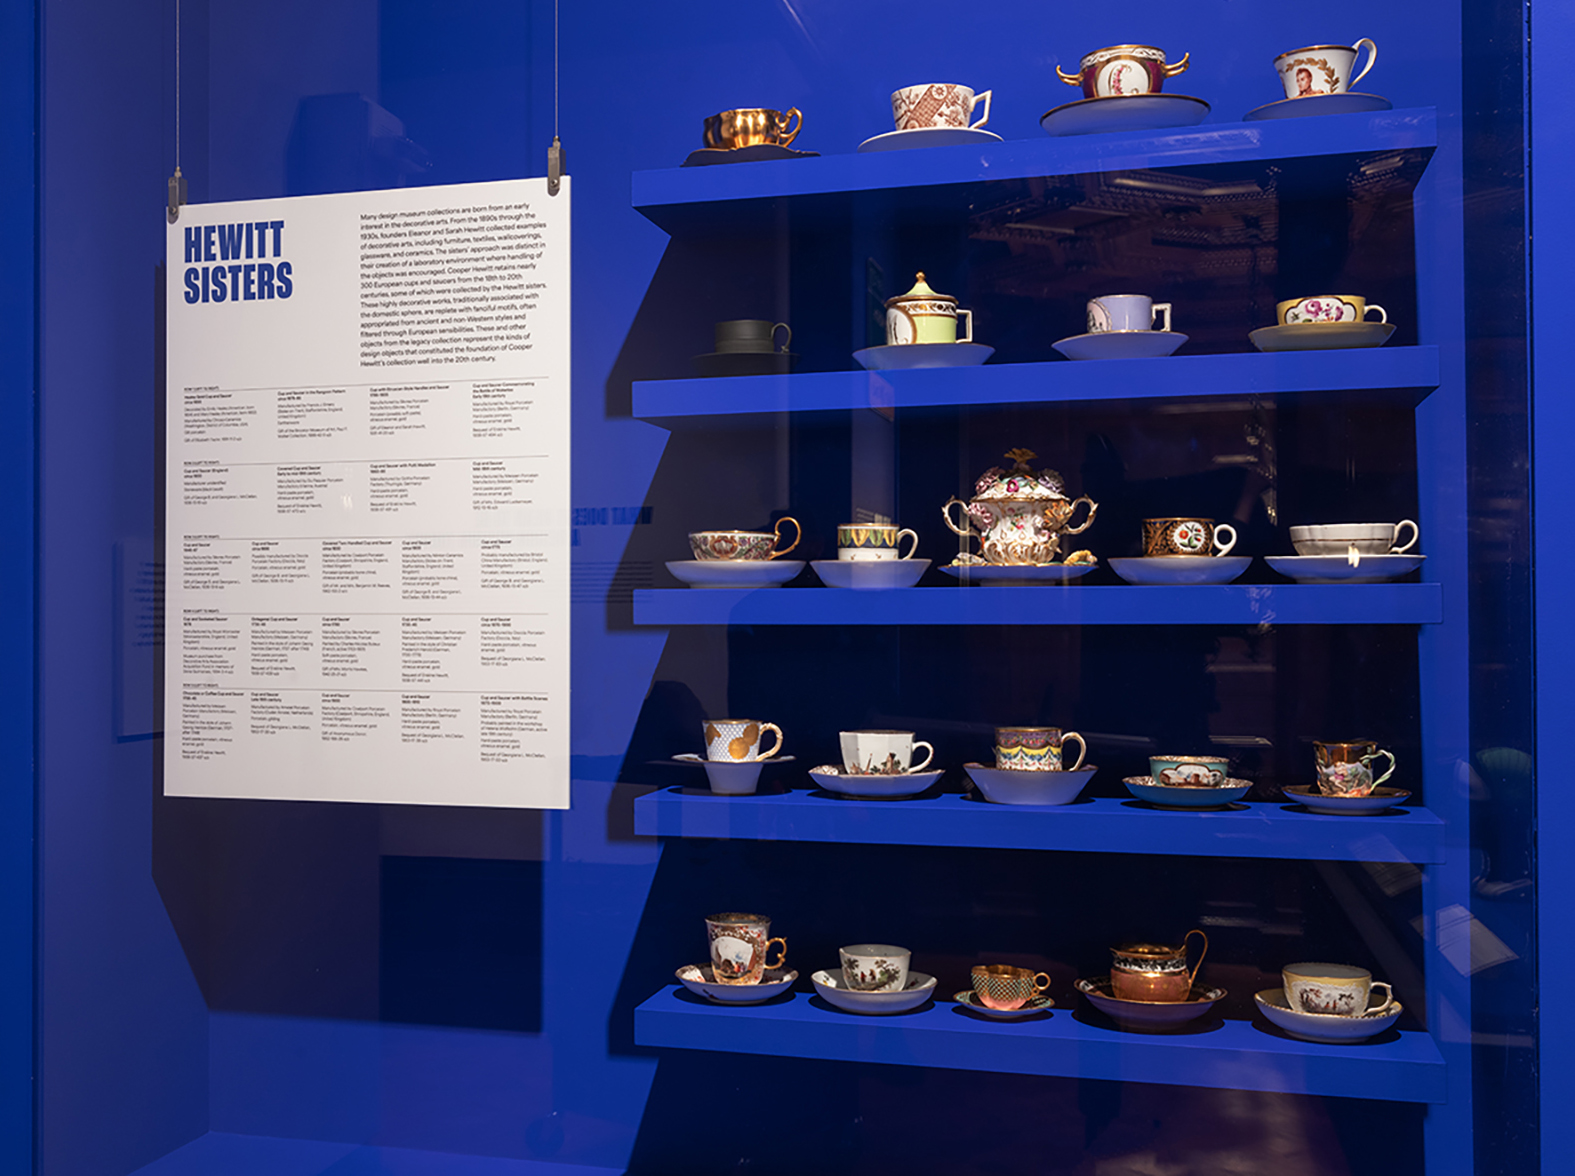
Installation of cups and saucers from the collection in Acquired! Shaping the National Design Collection, 2024.
Acquired! features a wall of porcelain cups and saucers that were collected early in the museum’s history and throughout the 20th century. Before being installed in the gallery for this exhibition, the pieces were brought out of storage and into the objects conservation lab for examination. Several cups and saucers displayed small areas of damage, typically shallow chip losses at rims, about a quarter inch in length. Tablewares made from porcelain—a high-fired, hard but brittle ceramic medium—are prone to this sort of damage that may be the result of use or handling.
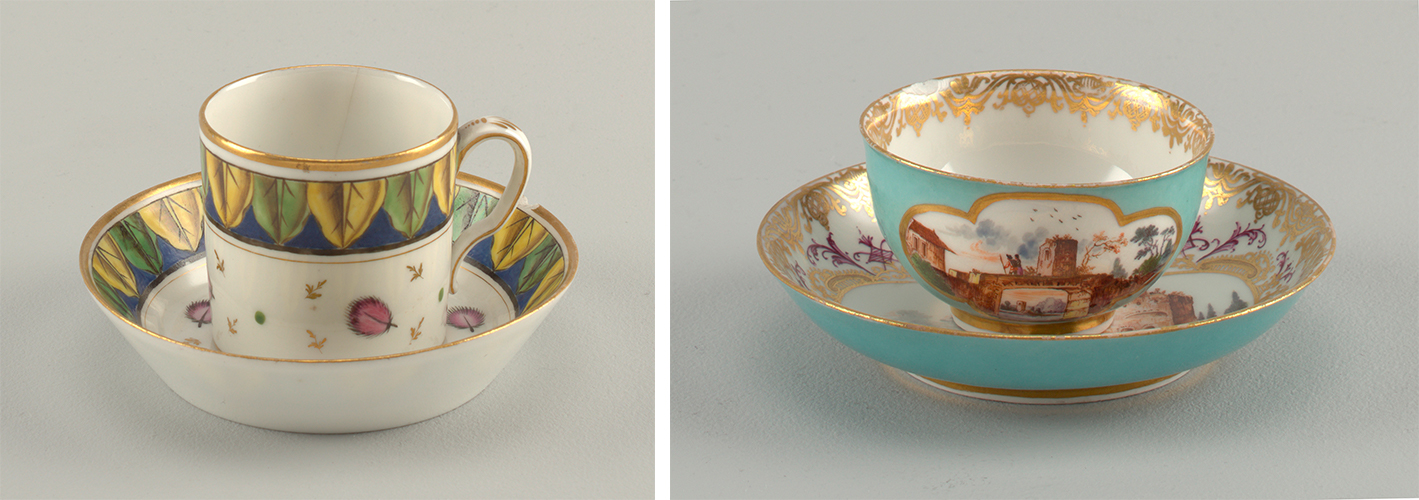
LEFT: Cup and Saucer, circa 1800; Possibly manufactured by Doccia Porcelain Factory (Doccia, Italy); Porcelain, vitreous enamel, gold; Cooper Hewitt, Smithsonian Design Museum, Gift of George B. and Georgiana L. McClellan, 1936-13-11-a,b; RIGHT: Cup and Saucer, 1735–45; Manufactured by Meissen Porcelain Manufactory (Meissen, Germany); Painted in the style of Christian Frederich Herold (German, 1700–1779); Hard-paste porcelain, vitreous enamel, gold; Cooper Hewitt, Smithsonian Design Museum, Bequest of Erskine Hewitt, 1938-57-441-a,b
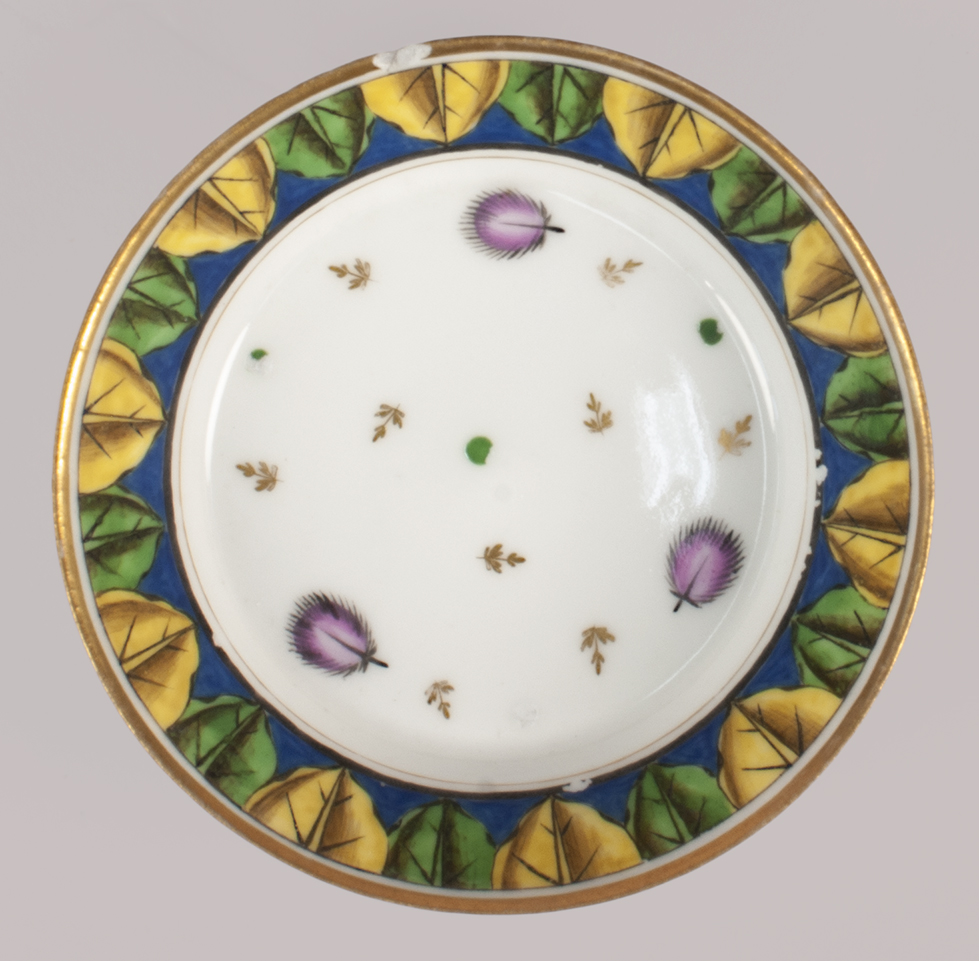
Before treatment: note the losses along the rim that extend into the gilt designs.
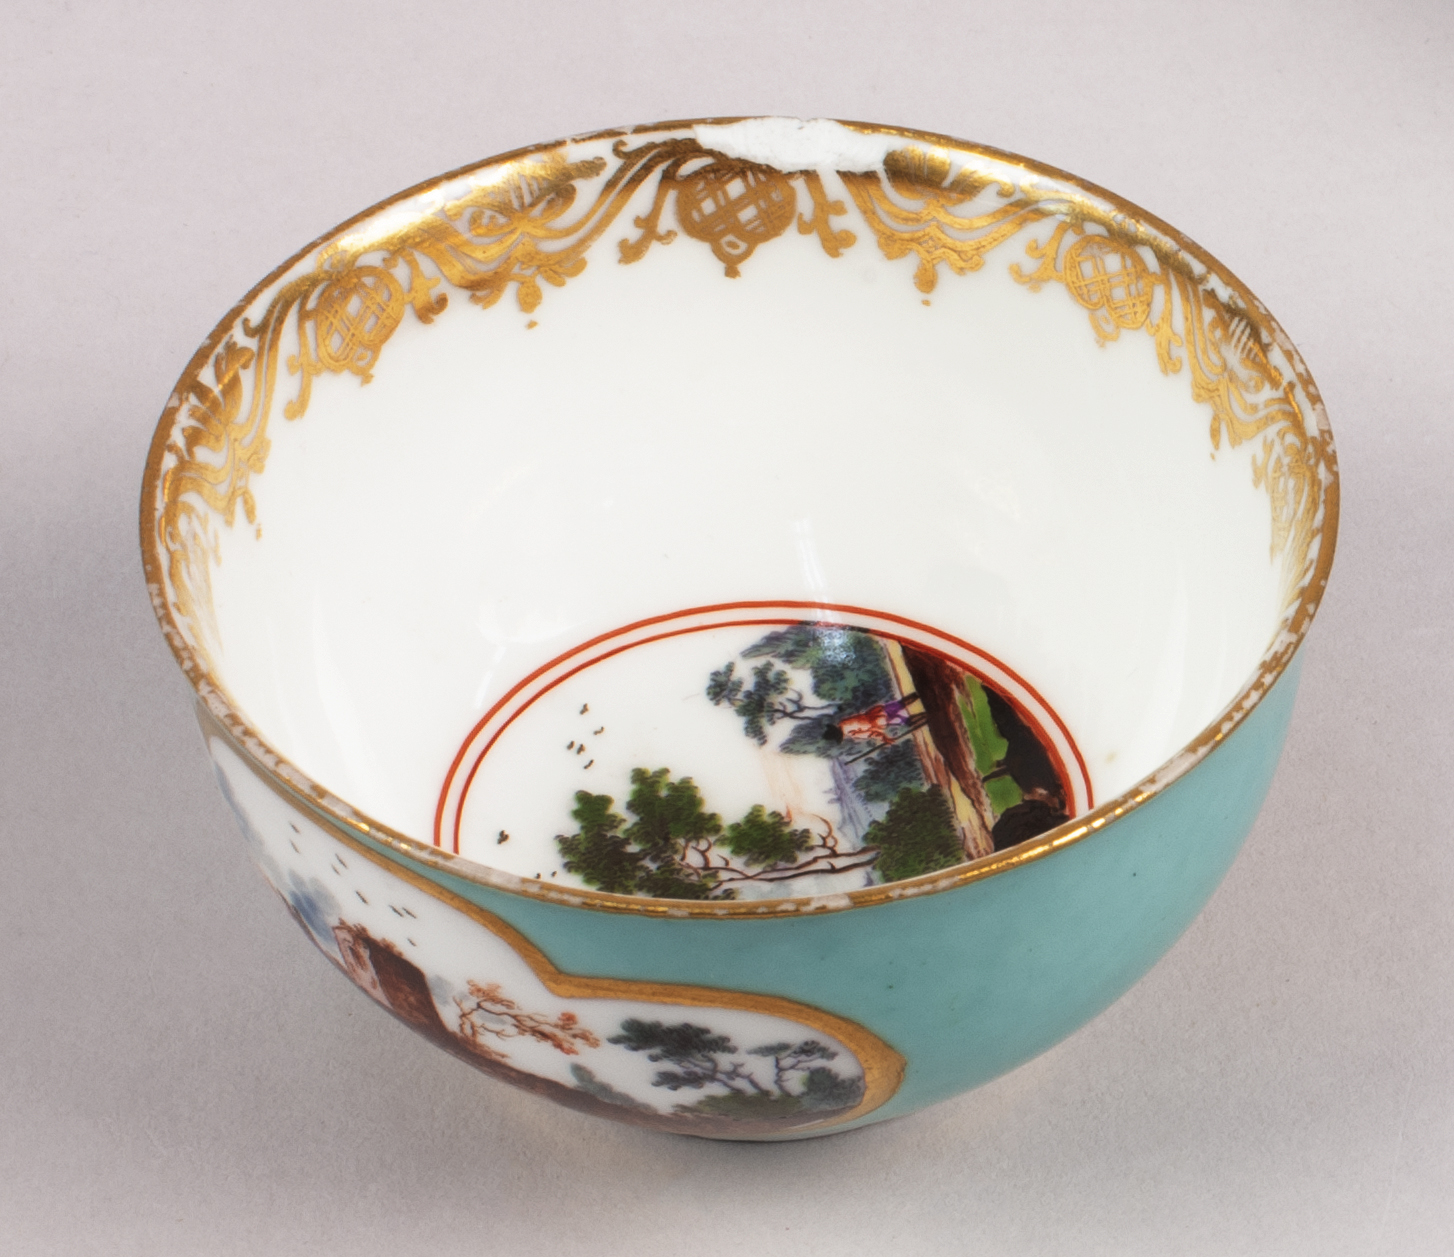
Before treatment: note the losses along the rims that extend into the gilt designs.
As the damage along the edges of several pieces disrupted their decorative schema, the objects conservators and curators for the exhibition agreed to camouflage these areas of loss with restorations that would not be immediately visible to the gallery visitors. Objects in decorative arts collections and made of materials such as porcelain are typically restored to fully obscure any breaks or losses, whereas with archaeological ceramics, such as earthenware pottery, it is more accepted to leave areas of loss visible. In either case, conservators always document all steps of the treatment so that it is apparent what work was done, and the materials used for repairs are easily discerned from the original surfaces when examining the works under ultra-violet light.
The steps involved in porcelain restoration include applying a material to fill the damage, shaping it to match the profile of the object, and painting this “fill” to match the surrounding glaze and/or gilding. This is difficult because porcelain is typically slightly translucent, so any material used to restore damage to the body of the ceramic must be of a similar opacity. Additionally, restoration materials should age well, meaning they should be stable over time and ideally not yellow or discolor—or worse, degrade causing damage to the original collection object.
Conservators often use a two-part epoxy system called Hxtal NYL-1 in porcelain treatment; this epoxy was formulated for use with historic glass, and testing has shown it to age well without discoloring. The epoxy is clear—otherwise called “water white”—and very runny when first mixed. To stiffen and opacify the epoxy, we mix in a very fine glass powder called fumed silica. This paste is then tinted to match the porcelain using dry pigments: porcelain is not purely white but often tinted slightly green or blue. The paste is applied in thin layers and allowed to cure in between applications. Finally, the fill is painted to replicate the glaze design.
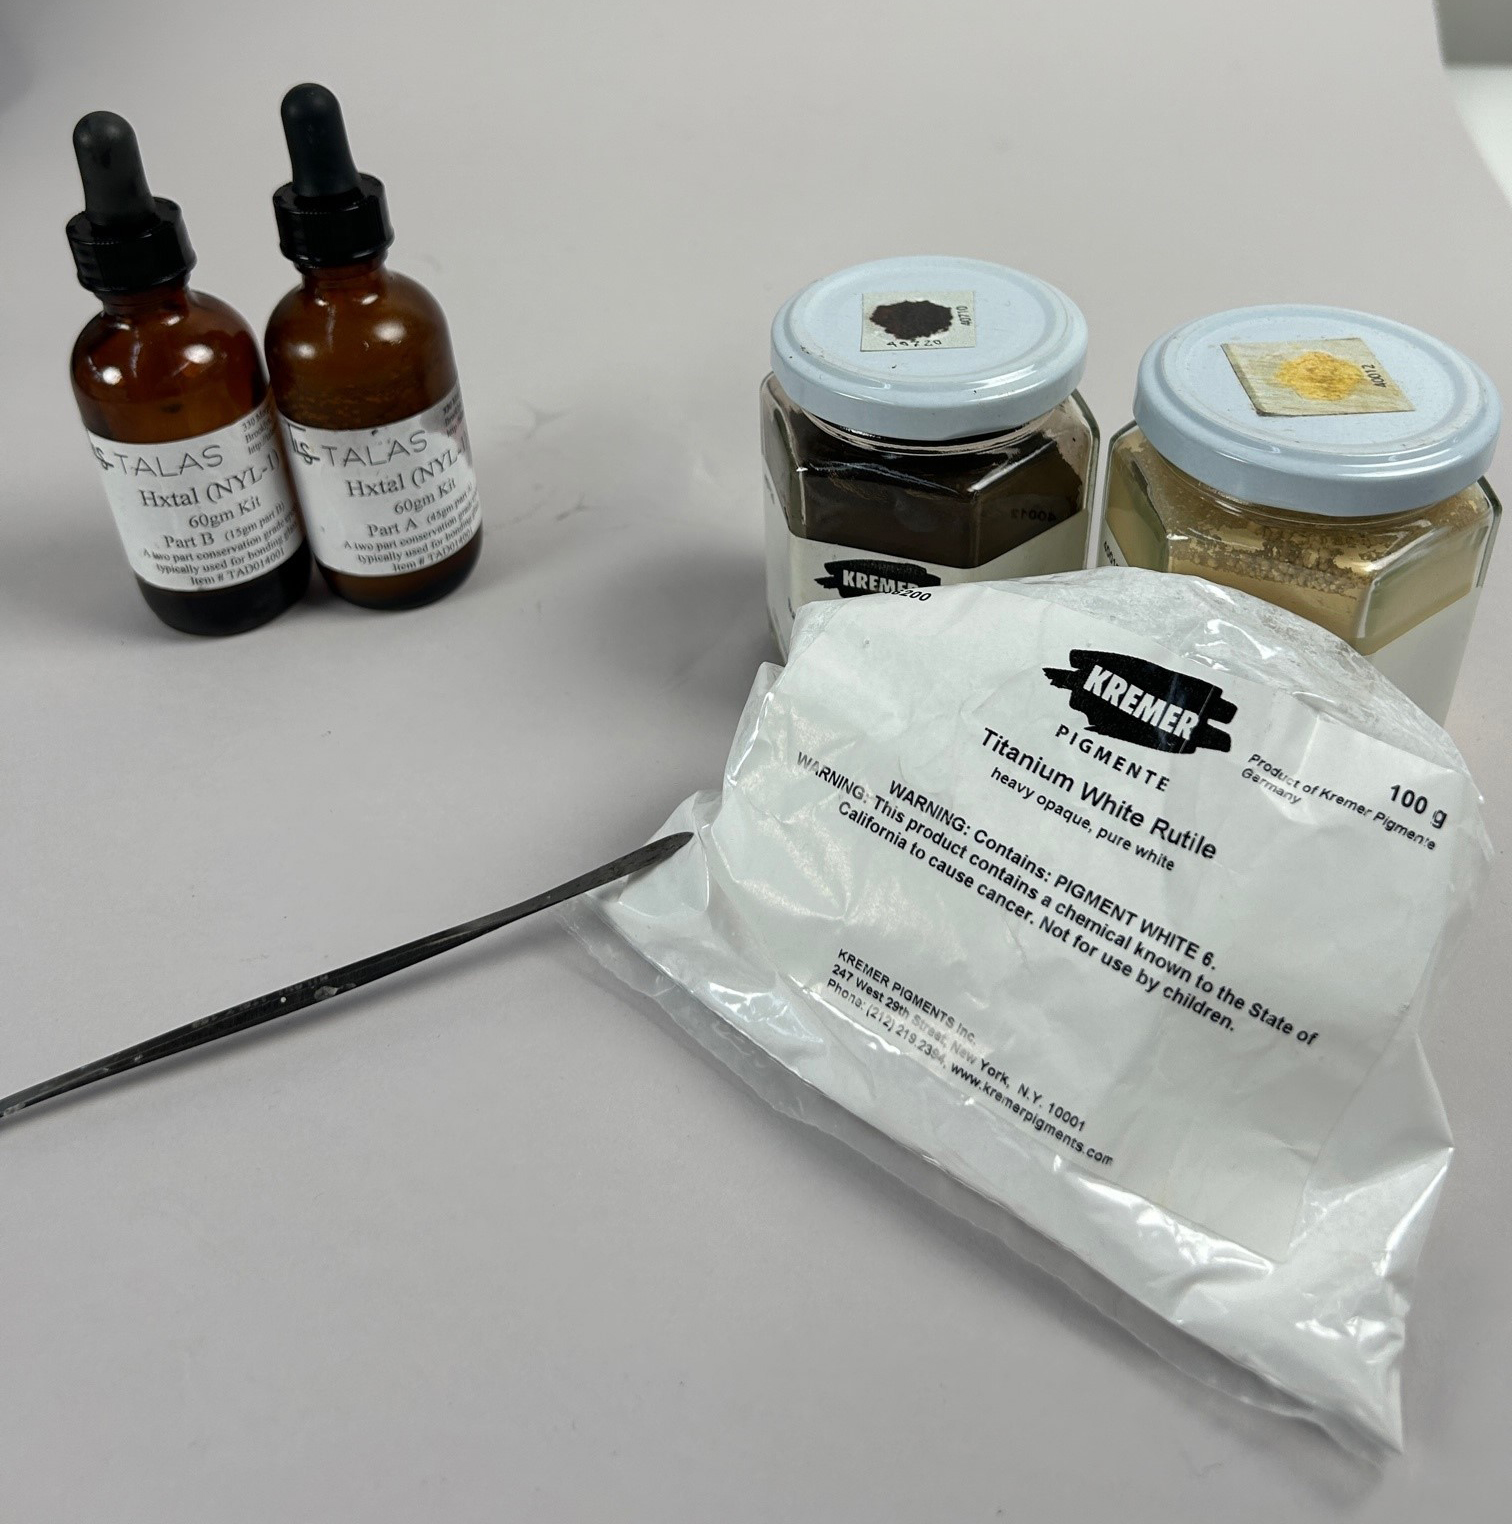
Conservation materials for conserving porcelain: a two-part epoxy at the left, powdered mineral pigments, including Titanium White and two different ochres at the right.
In the case of these two examples selected for display in Acquired!, the gilt designs also needed to be replicated as part of the chip repair. It is challenging to simulate gilding on porcelain because the original gold was applied to the glazed surface and heated in a kiln to create a seamless, glossy texture. We approach this problem using multiple strategies, depending on the object. The fill on the saucer was gilt through the application of actual gold leaf, which was adhered to the surface of the cured epoxy and then further toned with paint to match the fired gold. The cup was instead painted with gold-colored pigment in a high-gloss binder. Though the former technique, using gold leaf, can be very difficult due to the fragility of the metal leaf, this process can yield a gold surface that more readily replicates a fired surface. It is therefore often chosen when flat expanses of gilding require restoration.

Restoration materials for gilt porcelain, from left to right: gold leaf, Mica powder, and a palette.
Though the losses were small, filling them through careful conservation treatment restores the beauty of the porcelain cup and saucer while remaining faithful to their intended visual appearance.
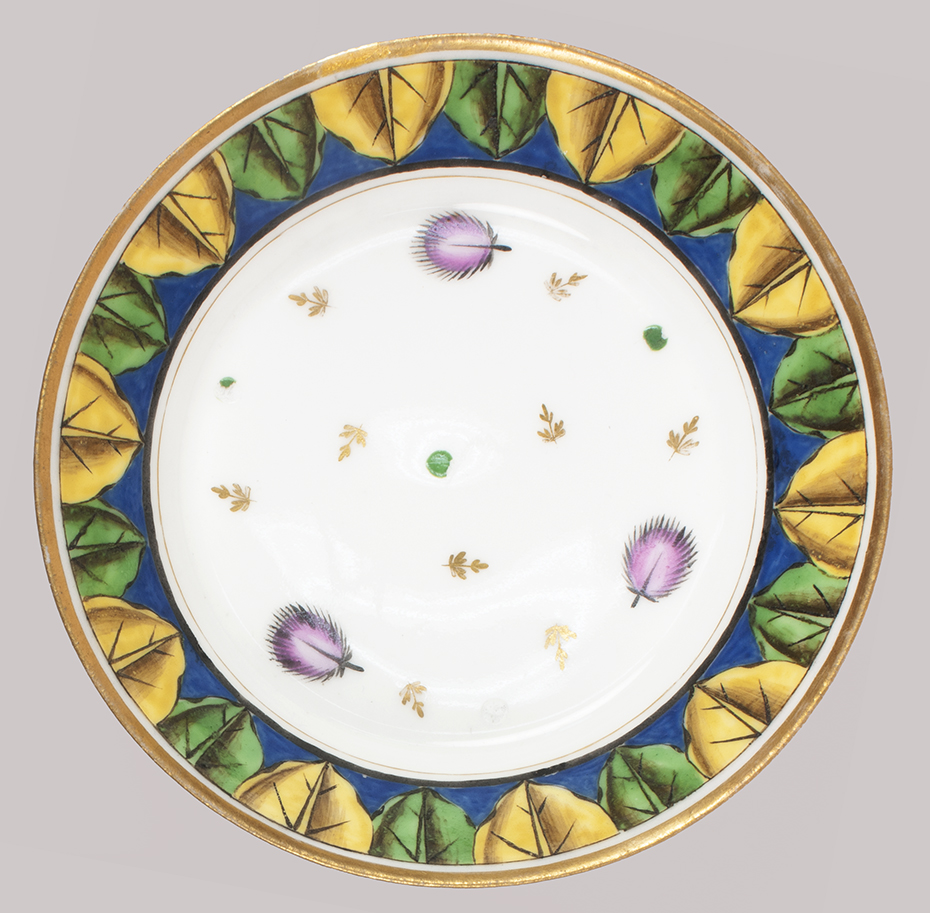
After treatment: the areas of gold have been inpainted to match the porcelain.
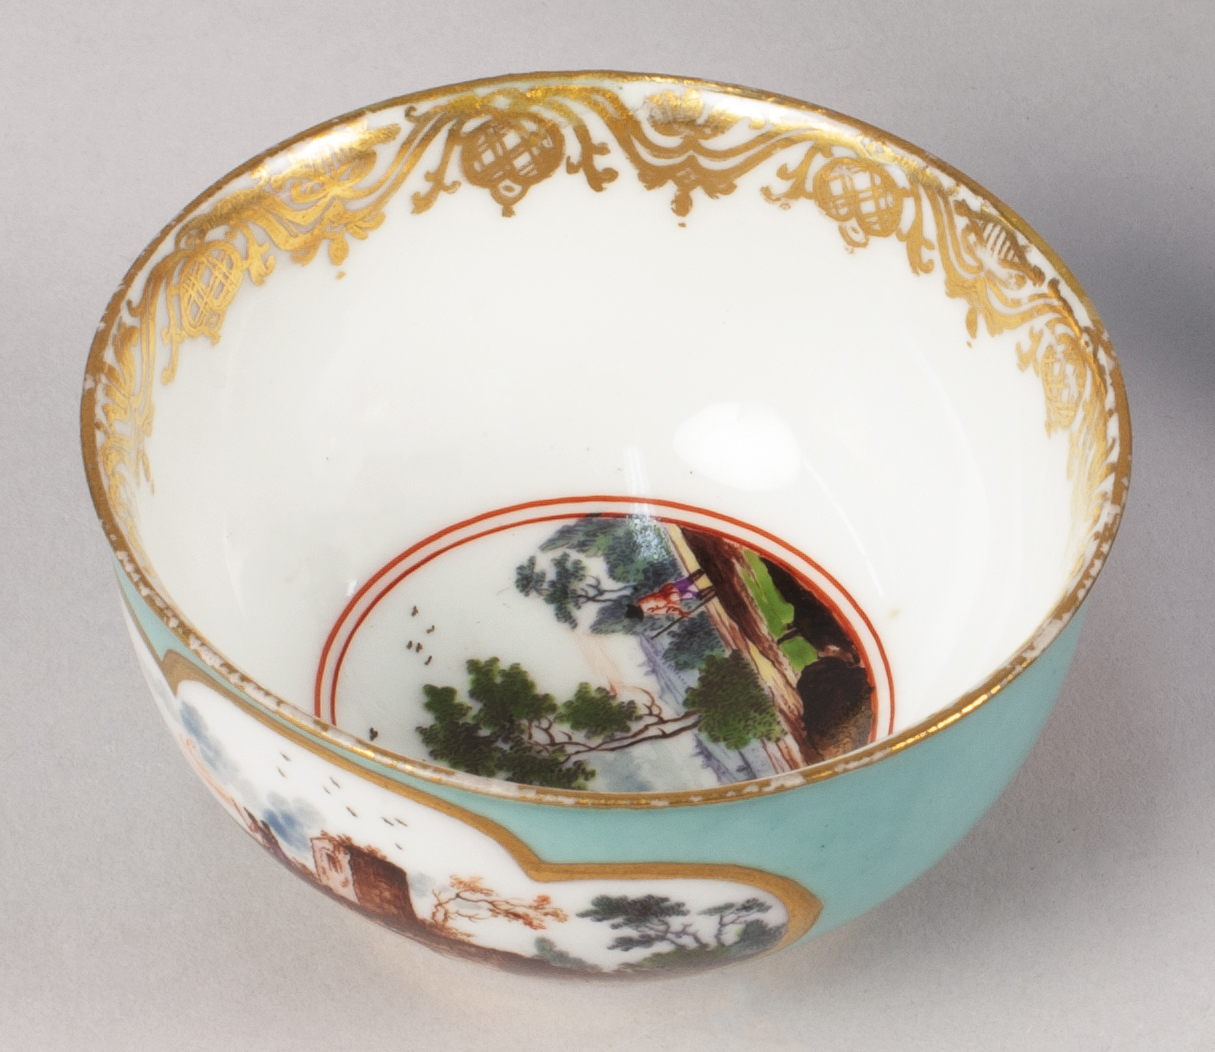
After treatment: the areas of gold have been inpainted to match the porcelain.
Sarah Barack is Senior Objects Conservator and Head of Conservation at Cooper Hewitt.
The exhibition Acquired! is on view at Cooper Hewitt through August 26, 2024.
3 thoughts on “A Closer Look: Porcelain Restoration”
Letitia Roberts on May 2, 2024 at 12:33 pm
This was a fascinating report on how complicated even the seemingly simplest restorations can be; how they are accomplished by trained conservators using special materials; and why they are so time-consuming and ultimately expensive. It is remarkable what can be achieved by materials that weren’t available in previous generations. The results of the restoration of the chip on the rim of each of these pieces was superb, although appropriately visible to the trained eye. Thank you for introducing to the curious but largely-oblivious public this important aspect of the museum’s care and conservation responsibilities and choices. (Having worked as the Director of European Ceramics and Chinese Export porcelain at Sotheby’s for years until 2001, I am acutely aware of quality in this area, and I am happy to commend your conservators!)
Peter A Blacksberg on May 8, 2024 at 5:03 am
Well told.
Perhaps macro photography of the before and after detail would help us understand the precision of your work and implementation of respectful restoration.
Restoring objects to ‘near original’ state I is the similar to my approach to restoring photographs. Kudos.
Kathleen Hartzell on May 13, 2024 at 9:01 pm
It’s rare to get such a glimpse behind the scenes of art restoration. I would so enjoythe ability to see a short video that would explain this with actual steps in the process.
Thank you!